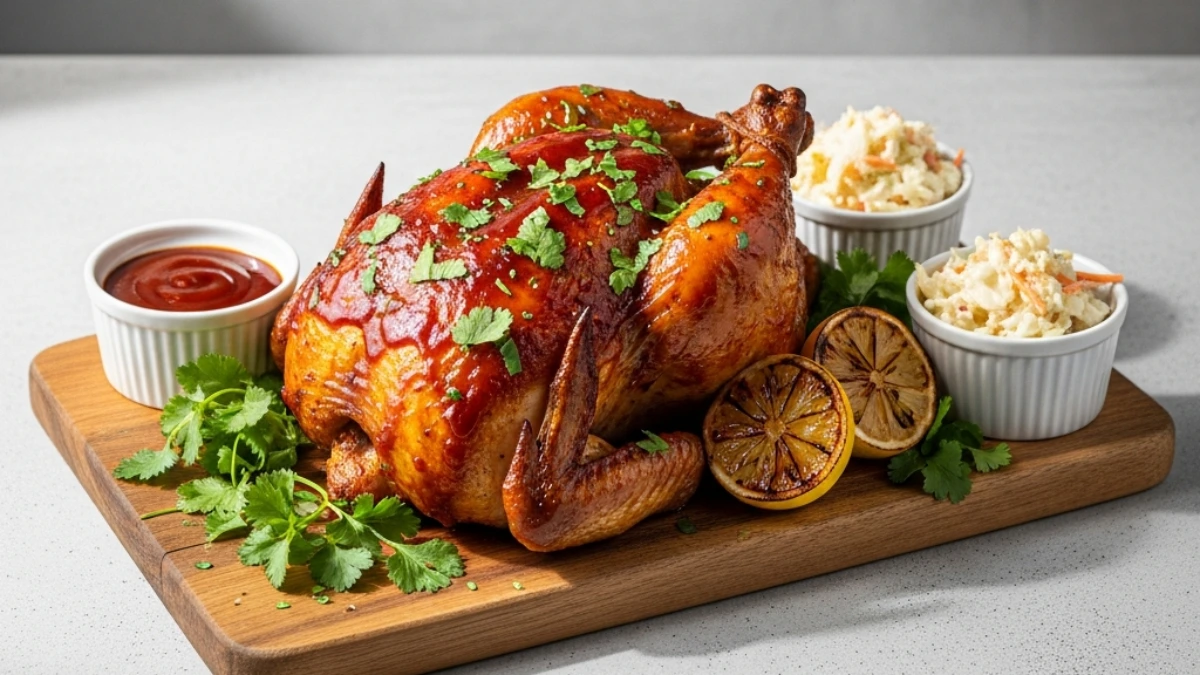
Fried chicken, or Southern-style fried chicken from the American South, is that one dish you crave when you need something that hits different.
You know that feeling when you bite into perfectly fried chicken and the crust shatters just right?
That crunch that makes you close your eyes for a second.
I’m talking about the kind of fried chicken that makes you forget about the grease splatters on your stove, the flour dusting your counter, and the fact that you’re probably eating it straight from the pan before it even makes it to the plate.
This isn’t some fancy restaurant version. This is the real deal. The kind your grandma would make if she had all day and zero patience for shortcuts.
And here’s the thing: most people mess up fried chicken because they rush it. They want the golden brown crust without putting in the time. They skip the buttermilk soak or pull it from the oil too early.
But not you. Not after this.
Because I’m about to walk you through every single step to make fried chicken so good, you’ll be making it on repeat. The crispy, salty, peppery outside. The tender, juicy inside that practically falls off the bone.
This is the recipe you’ll bookmark, screenshot, and text to your friends when they ask how you made that chicken.
Let’s get into it.
What You’ll Need
For the Chicken:
- 3 lbs chicken pieces (drumsticks, thighs, breasts, wings)
- 2 cups buttermilk
- 2 large eggs
- 2 tablespoons hot sauce (like Frank’s or Tabasco)
- 1 tablespoon salt
- 1 teaspoon black pepper
- 1 teaspoon garlic powder
- 1 teaspoon paprika
For the Coating:
- 2 ½ cups all-purpose flour
- 1 tablespoon salt
- 2 teaspoons black pepper
- 2 teaspoons garlic powder
- 2 teaspoons onion powder
- 1 teaspoon paprika
- 1 teaspoon cayenne pepper (adjust to your spice level)
- ½ teaspoon dried thyme
- ½ teaspoon dried oregano
For Frying:
- 6-8 cups vegetable oil or peanut oil (enough for 2-3 inches in your pot)

Tools You’ll Need
You don’t need a kitchen full of fancy gadgets, but these basics will make your life easier:
- Large mixing bowl
- Shallow dish or pie plate
- Dutch oven or deep cast-iron skillet
- Meat thermometer (seriously, get one)
- Wire cooling rack
- Baking sheet
- Tongs
- Paper towels
Pro Tips for Perfect Fried Chicken
“The buttermilk soak is non-negotiable. Don’t skip this. The acid in the buttermilk breaks down the proteins in the chicken, making it insanely tender. Plus, it helps the coating stick like glue.”
1. The buttermilk soak changes everything.
Let it sit for at least 4 hours, but overnight is even better. This is what separates okay fried chicken from the kind people talk about for weeks.
2. Double-dredge for maximum crunch.
Coat the chicken in flour, dip it back in the buttermilk mixture, then coat it again. This creates those crispy, craggy bits that everyone fights over. You want texture. You want crunch that echoes in your head.
3. Keep your oil at 325-350°F.
Too hot and your coating burns before the chicken cooks through. Too cool and you get soggy, greasy chicken. Invest in a meat thermometer. Check the oil temp between batches. Adjust your heat as needed.
4. Don’t crowd the pan.
I know you want to fry everything at once and be done with it. But cramming too many pieces in drops the oil temperature and gives you sad, limp fried chicken.
Fry in batches. Give each piece space to breathe.
5. Let it rest on a wire rack, not paper towels.
Paper towels trap steam underneath, which makes your beautiful crispy coating turn soggy. A wire rack lets air circulate so the fried chicken stays crunchy all around.
How to Make Southern Fried Chicken
Step 1: Marinate the Chicken
In a large bowl, whisk together the buttermilk, eggs, hot sauce, 1 tablespoon salt, 1 teaspoon black pepper, 1 teaspoon garlic powder, and 1 teaspoon paprika.
Add your chicken pieces. Make sure every piece is coated. Cover the bowl with plastic wrap and stick it in the fridge.
Let it sit for at least 4 hours. Overnight is even better. The longer it marinates, the more tender and flavorful your fried chicken will be.
Step 2: Make the Coating
In a shallow dish, combine the flour, salt, black pepper, garlic powder, onion powder, paprika, cayenne, thyme, and oregano. Mix it well.
Here’s a trick: scoop out about ¼ cup of the buttermilk marinade and drizzle it into the flour mixture. Use your fingers to work it in until you get little clumps.
Those clumps will fry up into the crispiest, most addictive bits on the chicken.
Step 3: Heat the Oil
Pour your oil into a Dutch oven or deep skillet. You want about 2-3 inches of oil.
Heat it over medium-high heat until it reaches 325-350°F. Use a thermometer. Don’t guess.
While the oil heats, set up your dredging station. Pull the chicken from the fridge. Set the buttermilk bowl on one side, your flour mixture on the other.
Step 4: Coat the Chicken
Take one piece of chicken at a time. Let the excess buttermilk drip off, then press it into the flour mixture. Coat it completely.
Now here’s the secret: dip it back into the buttermilk. Just a quick dunk.
Then press it into the flour again. Really pack it on. This double coating is what gives you that extra-crunchy crust on your fried chicken.
Set the coated pieces on a baking sheet while you finish the rest.
Step 5: Fry the Chicken
Carefully lower 3-4 pieces into the hot oil. Don’t drop them. You’re not trying to splash oil everywhere.
Fry for about 12-15 minutes, flipping halfway through. Dark meat (thighs and drumsticks) takes a little longer than white meat (breasts and wings).
You’re looking for a deep golden brown color and an internal temperature of 165°F for breasts and 175°F for thighs and drumsticks.
Step 6: Drain and Rest
Pull the fried chicken from the oil with tongs and set it on a wire rack over a baking sheet.
Let the oil come back up to temperature before you add the next batch.
Repeat until all your chicken is fried.
Sprinkle a little extra salt on the chicken while it’s still hot. The salt sticks better and the flavor goes straight into that crispy coating.
Let the chicken rest for at least 5 minutes before you dig in. I know it’s hard, but this lets the juices redistribute so every bite is juicy.
Step 7: Serve and Devour
Pile it on a platter. Grab some hot sauce, honey, or whatever you like to dip your fried chicken in.
And enjoy every single crispy, juicy bite.
Fried Chicken Substitutions and Variations
| Ingredient | Substitution | Notes |
|---|---|---|
| Buttermilk | 2 cups whole milk + 2 tbsp vinegar | Let sit 10 minutes before using |
| All-purpose flour | Gluten-free flour blend or cornstarch + rice flour | Texture will be slightly different |
| Vegetable oil | Peanut oil, canola oil, or avocado oil | Must have high smoke point |
| Hot sauce | Extra cayenne pepper or chili powder | Adds spice without liquid heat |
| Fresh chicken | Frozen chicken (thawed completely) | Pat very dry before marinating |
Want it spicier? Add more cayenne to the flour mixture or toss in some chili powder. You could also marinate the chicken in hot sauce overnight for a Nashville hot chicken vibe.
Air fryer version? Spray the coated chicken with cooking spray and air fry at 375°F for about 25-30 minutes, flipping halfway through. It won’t be quite as crispy as deep-fried, but it’s a solid option.
Oven-fried? Bake the coated chicken on a wire rack over a baking sheet at 425°F for about 35-45 minutes, flipping halfway. Again, not the same as frying, but way less messy.
Make Ahead Tips for Fried Chicken
You can bread the chicken up to 4 hours ahead of time. Just keep it uncovered in the fridge so the coating stays dry and crispy.
If you want to prep even further ahead, you can freeze the breaded chicken. Lay the pieces in a single layer on a baking sheet and freeze until solid, then transfer to a freezer bag.
When you’re ready to fry, let them thaw in the fridge overnight.
The buttermilk marinade can be done up to 24 hours in advance. Just keep the chicken covered and refrigerated.
Nutritional Information
Here’s what you’re getting per piece of fried chicken:
| Nutrient | Per Serving (1 piece) |
|---|---|
| Calories | 420 |
| Protein | 28g |
| Carbohydrates | 18g |
| Fat | 26g |
| Saturated Fat | 5g |
| Cholesterol | 110mg |
| Sodium | 680mg |
| Fiber | 1g |
| Sugar | 2g |
Based on 8 pieces total. Numbers are estimates and can vary depending on chicken size and oil absorption.
What to Serve With Fried Chicken
Fried chicken pairs perfectly with classic southern sides:
- Mashed potatoes and gravy for that comfort food combo you can’t beat
- Coleslaw for something cool and crunchy to balance the richness
- Mac and cheese because yes, you can have double carbs and it’s delicious
- Cornbread with butter and honey
- Biscuits if you want to go all in
- Collard greens or green beans for something lighter
- Potato salad for a picnic vibe
Honestly, fried chicken is so good on its own that you could eat it with just a napkin and be happy.
According to the National Chicken Council, Americans consume more chicken per capita than any other protein, with fried chicken remaining one of the most popular preparations across the country.
Leftovers and Storage
Store leftover fried chicken in an airtight container in the fridge for up to 3-4 days.
To reheat, don’t microwave it unless you want sad, soggy chicken. Instead, heat your oven to 375°F and bake the chicken on a wire rack for about 10-15 minutes until it’s heated through and the coating crisps back up.
You can also freeze fried chicken for up to 3 months. Let it cool completely, then wrap each piece in foil and store in a freezer bag.
Thaw in the fridge overnight and reheat in the oven.
Cold fried chicken straight from the fridge is also weirdly amazing. Don’t knock it until you try it. 🍗
Fried Chicken FAQ
How do I know when the chicken is done?
Use a meat thermometer. Chicken breasts should hit 165°F, and thighs and drumsticks should reach 175°F. Don’t rely on color alone because the coating can brown before the fried chicken is fully cooked.
Why is my coating falling off?
Usually this happens if the chicken is too wet when you coat it. Let the excess buttermilk drip off before dredging. Also, don’t move the chicken around too much once it hits the oil. Let it fry undisturbed for the first few minutes so the coating has time to set.
Can I reuse the frying oil?
Yes, but strain it through a fine-mesh sieve or cheesecloth to remove any burnt bits. Store it in an airtight container in a cool, dark place. You can reuse it 2-3 times, but toss it if it smells off or looks dark and murky.
What’s the best oil for frying chicken?
Vegetable oil and peanut oil are both great because they have high smoke points and neutral flavors. Avoid olive oil because it burns at lower temperatures.
Can I make this with boneless chicken?
Absolutely. Boneless thighs or breasts work great. Just adjust your frying time since they’ll cook faster. Check the internal temp to be sure.
How do I keep my fried chicken crispy if I’m making a big batch?
Keep finished chicken warm in a 200°F oven on a wire rack while you fry the rest. The low heat keeps it warm without making it soggy.
Why is my fried chicken greasy?
Your oil temperature is probably too low. When the oil isn’t hot enough, the chicken absorbs more oil instead of crisping up. Keep that thermometer handy and maintain 325-350°F.
Wrapping Up
So there you have it.
The kind of fried chicken that makes you lick your fingers and go back for another piece even though you’re already full.
It takes a little time. It makes a mess. But it’s worth it.
Every single bite.
Make it for Sunday dinner. Make it for a picnic. Make it just because you’re craving something crispy and comforting.
And when you do, come back and let me know how it turned out. Did you add extra spice? Did your family demolish it in 10 minutes flat? Did you eat half of it standing at the stove before anyone else got a piece?
Drop a comment below. I want to hear all about it.
Now go fry some chicken.